Our New Home Reno Series: Installing Picture Frame Moulding
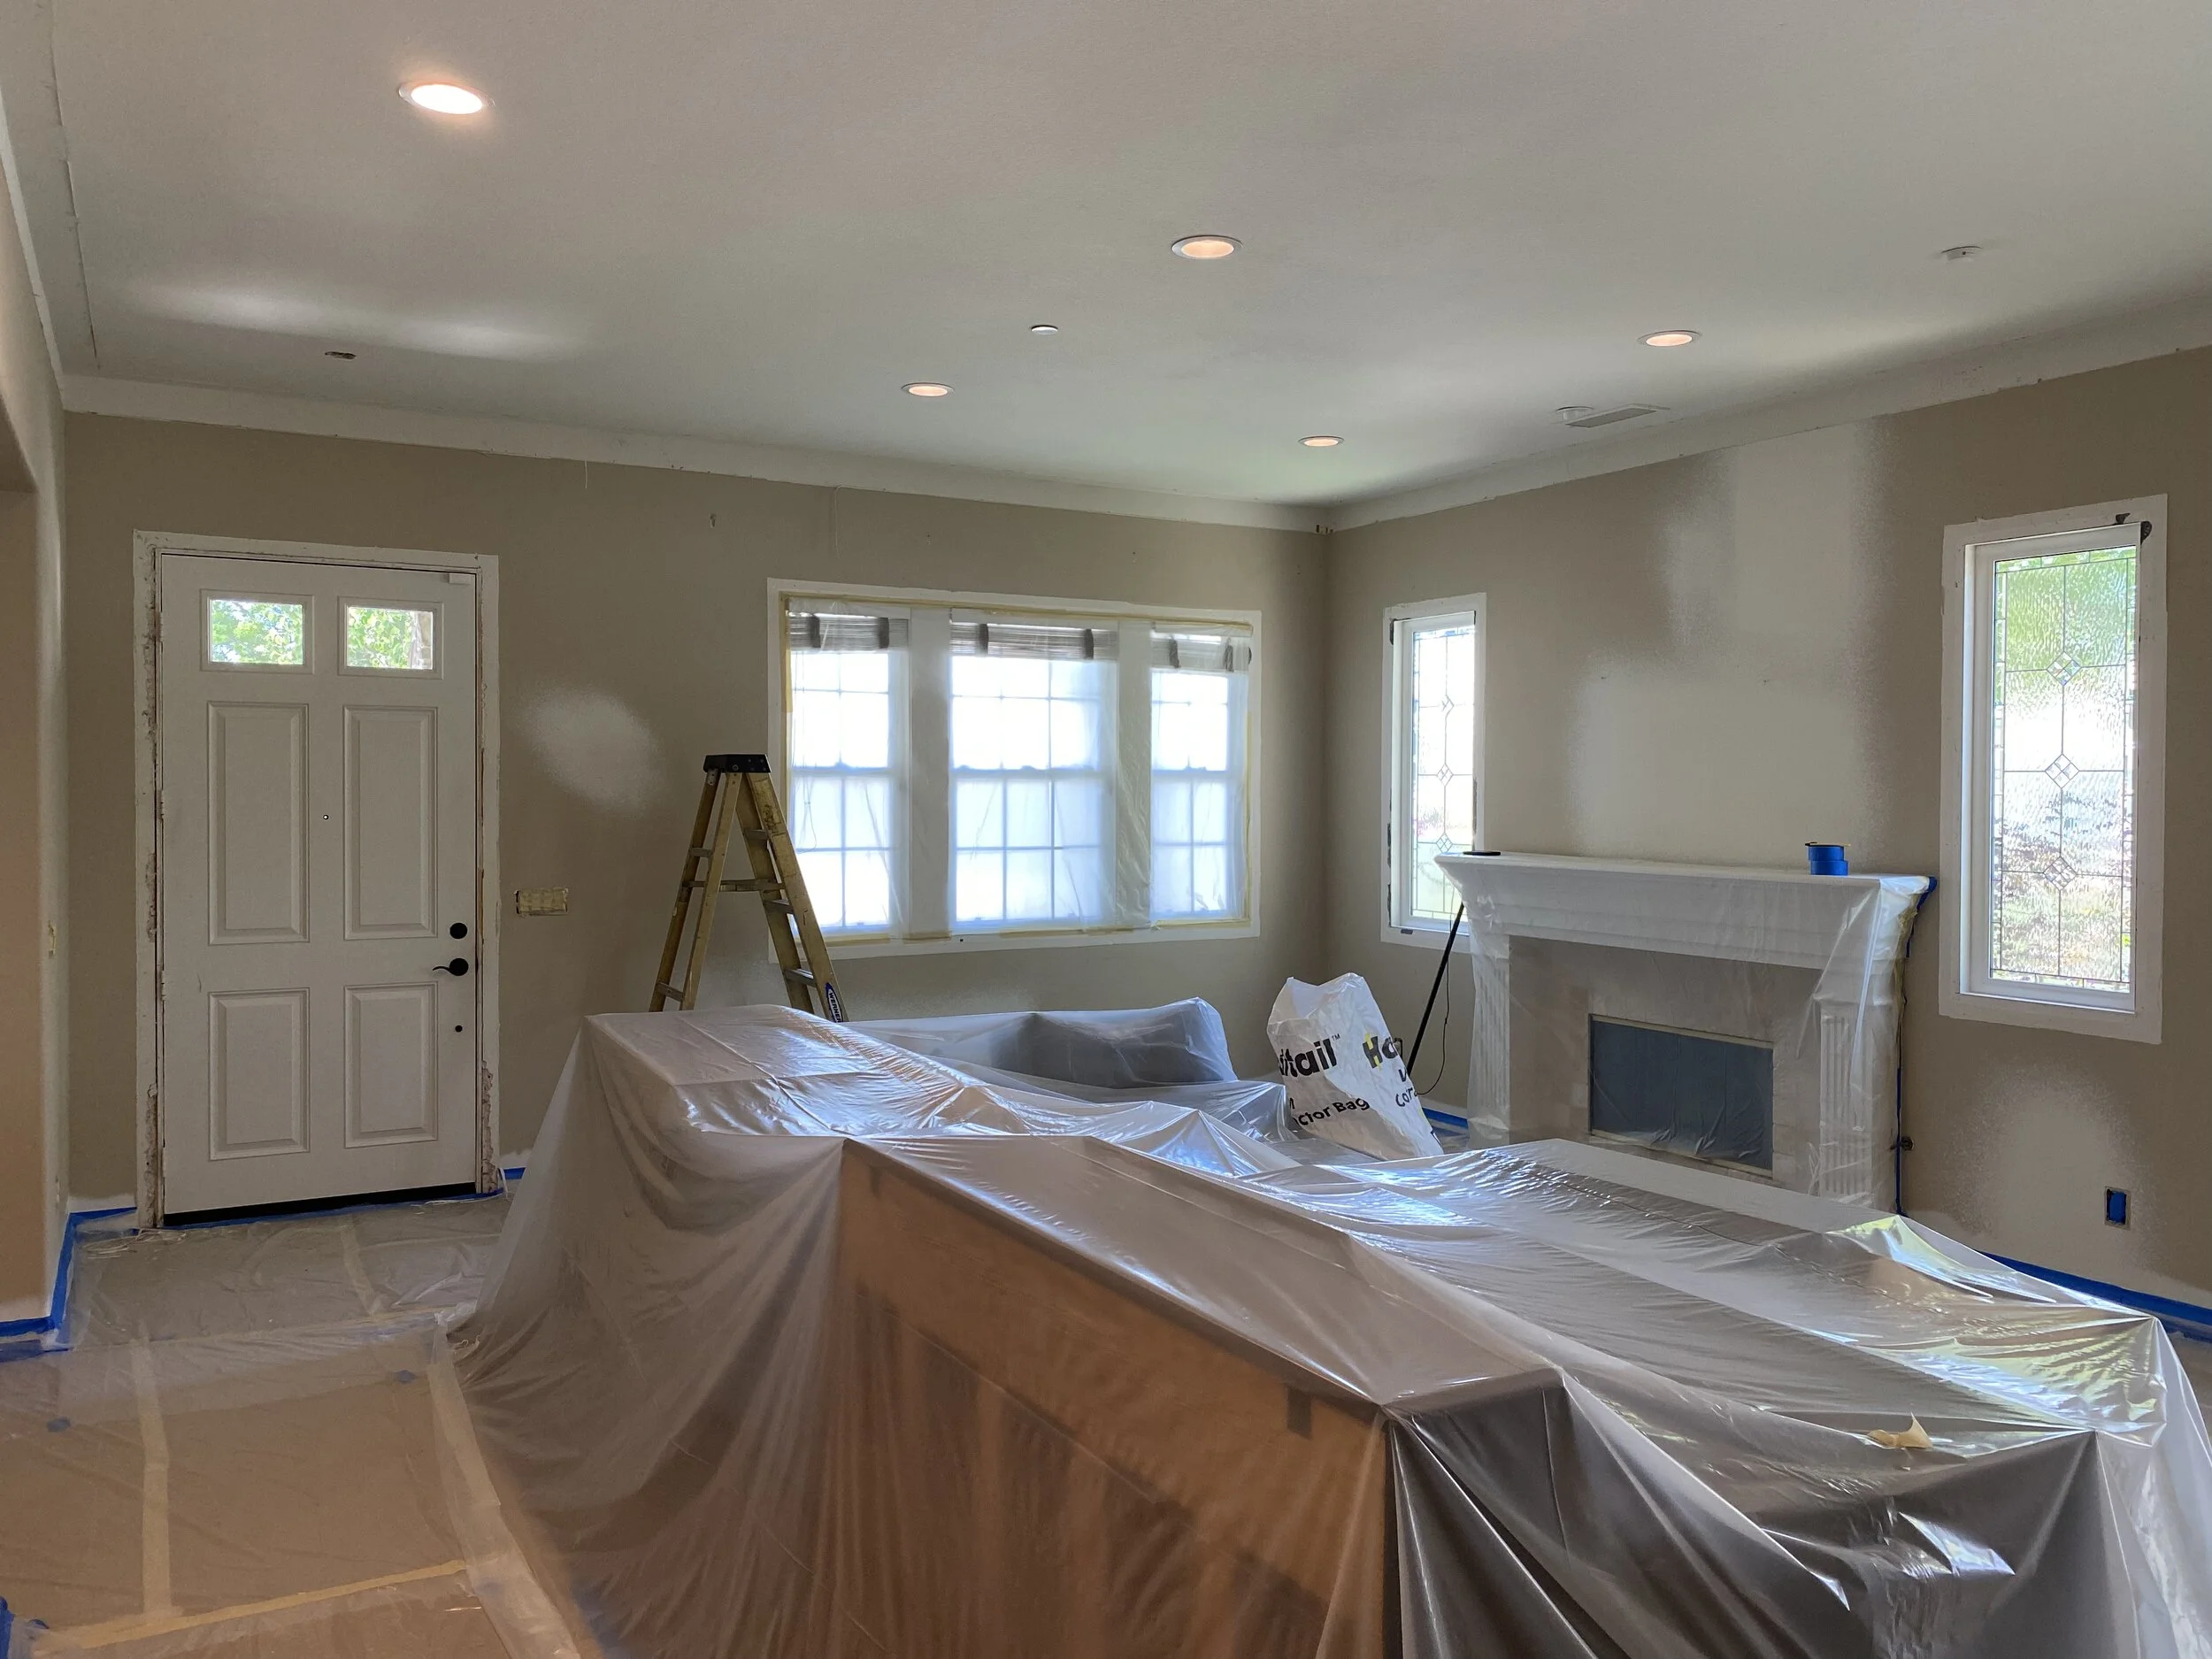
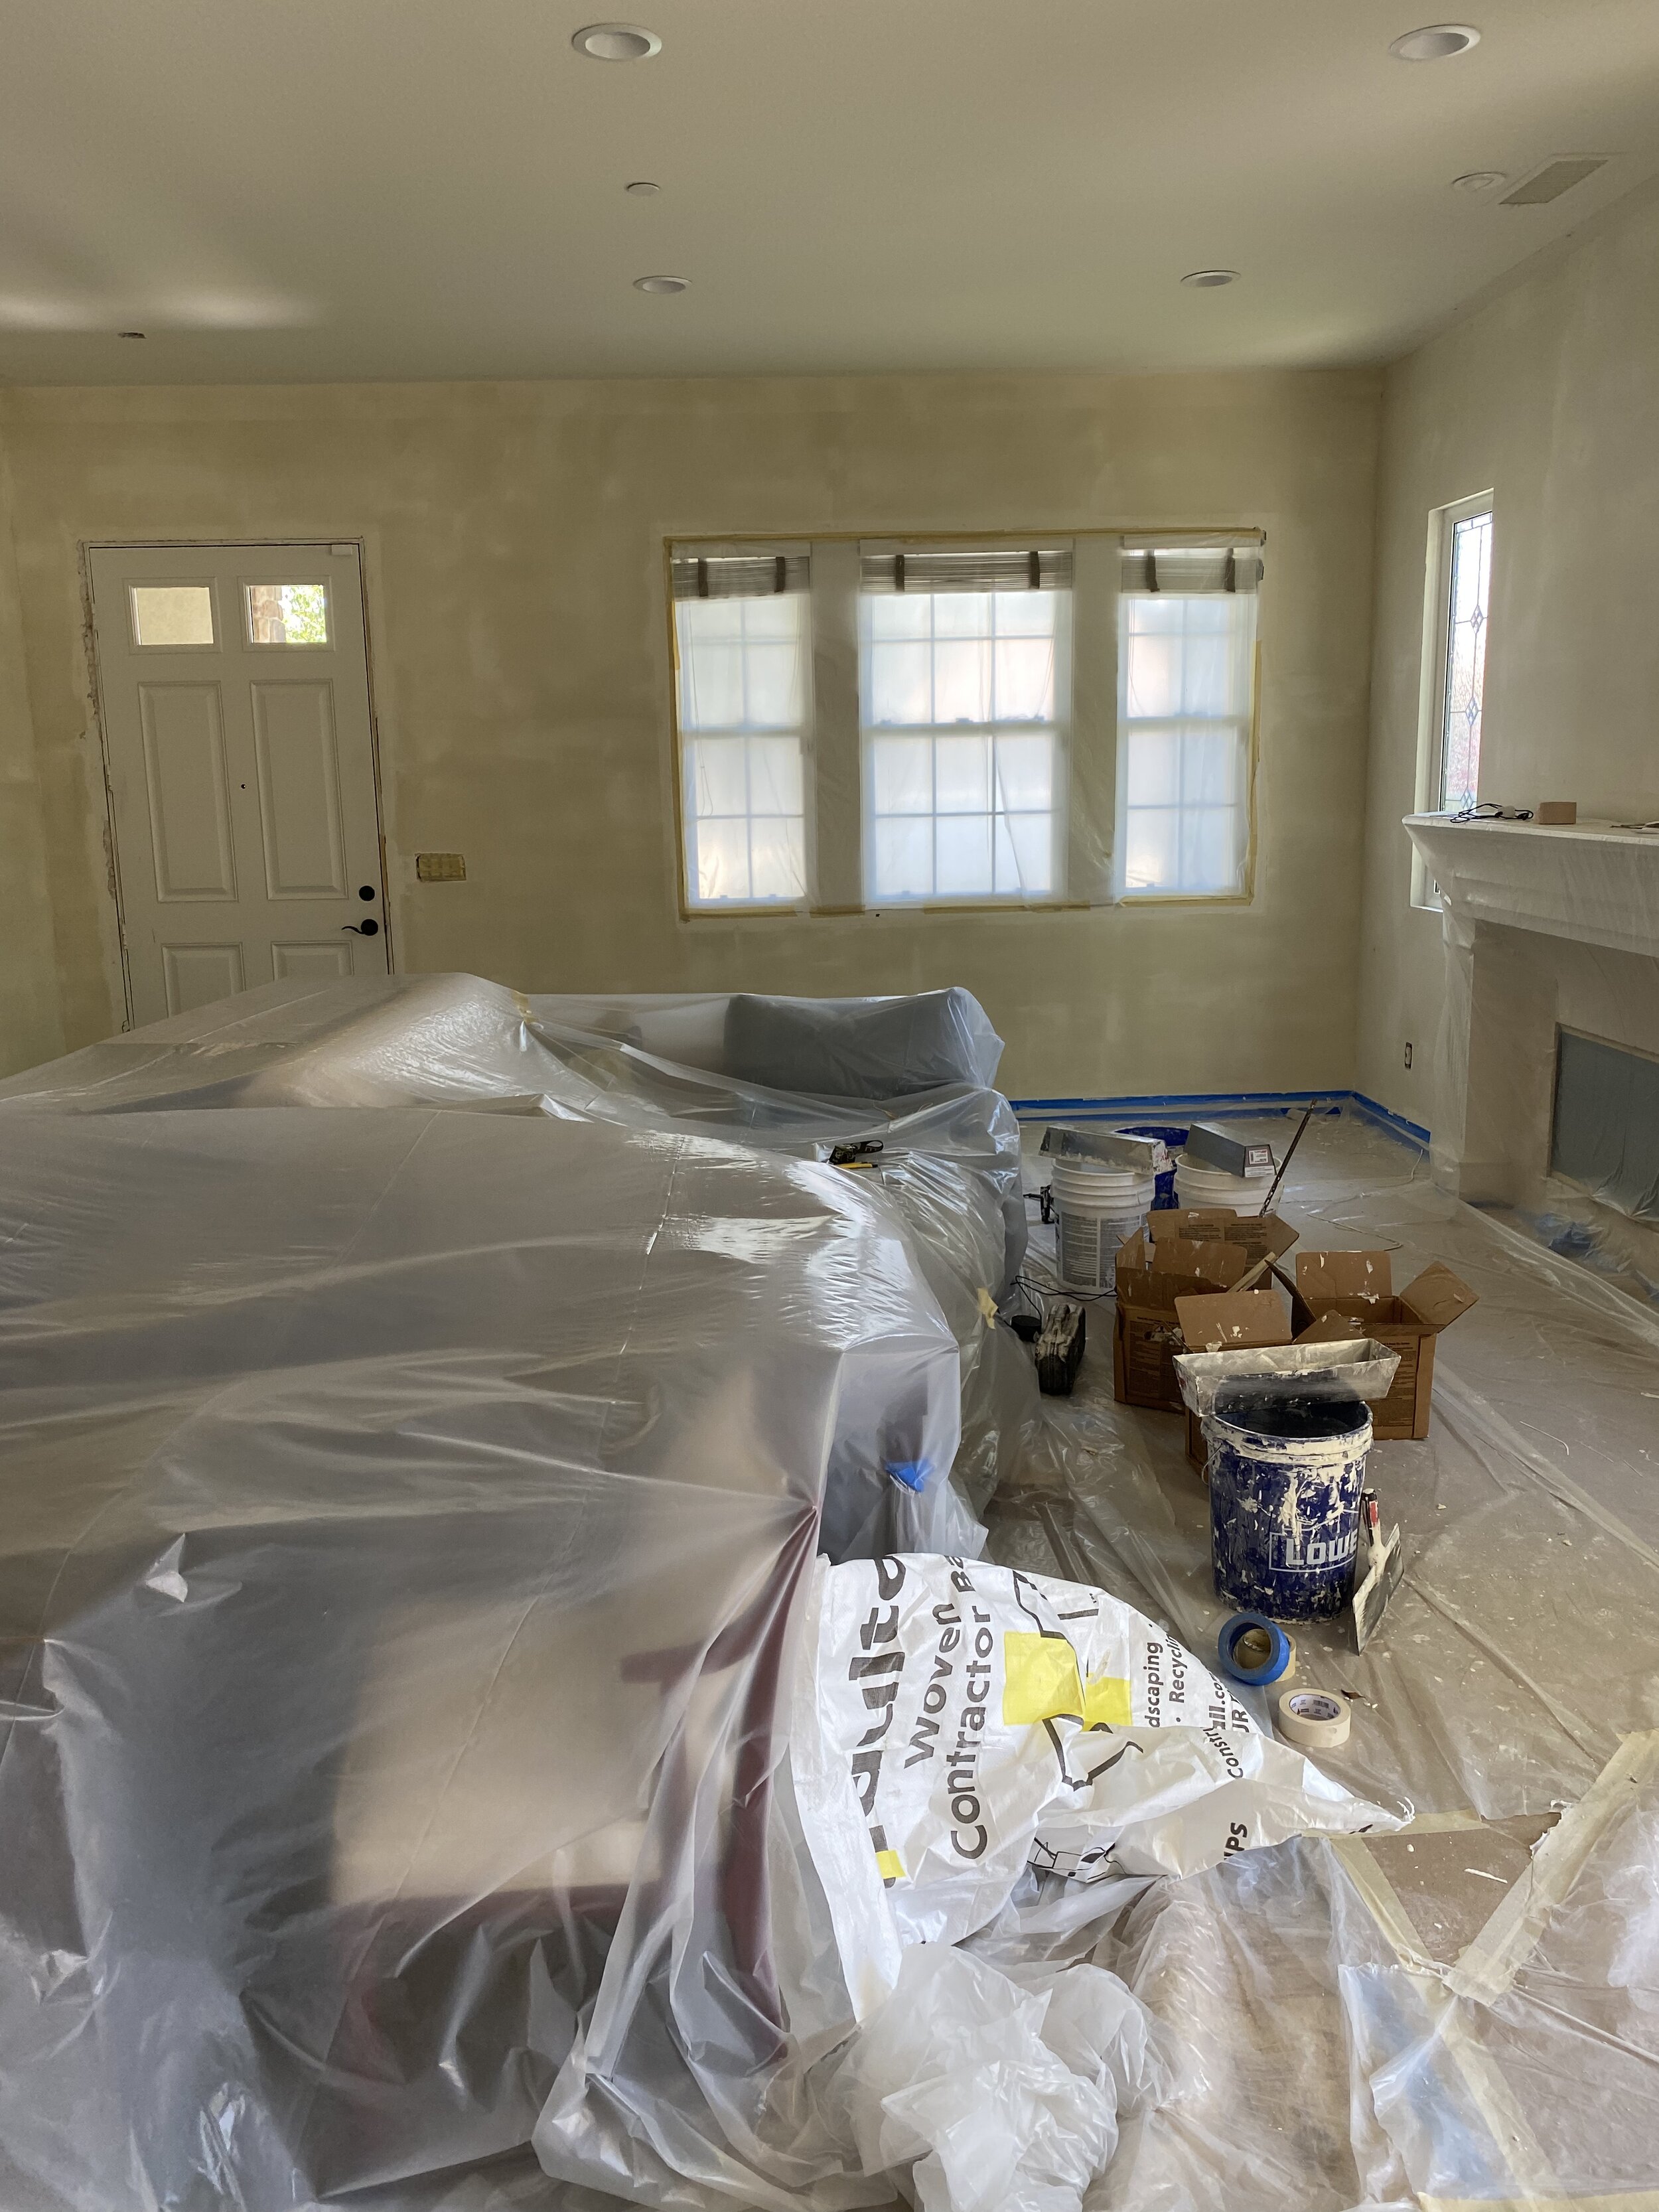
It’s been a while since I checked in about our home reno projects. For the past 3 weeks, everything has been covered in cardboard and plastic. It’s been a little painful. And dusty. But, I’m looking forward to sharing the result with you VERY soon!
So, you may remember that my plan was to cover the living/dining room and stair wall with picture moulding. Once the moulding is installed, I’ll have our painter spray the smooth walls with a semi-gloss paint finish so the walls will look like wood paneling. By the way, if you’re new around here, you can catch up on my story by going to the first article on my blog about our home reno. Here’s a link.
The first step however, was to have a drywall company come in and smooth coat the walls with plaster.
My drywall contractor did a beautiful job and now it was time for the moulding. In addition to picture moulding, we added new crown moulding, base moulding, and door and window casings. I am using the Colonial crown line with El & El Wood Products. You can find them easily online.

The plaster took 4 coats and one full week. The moulding added another 4 weeks. We also are replacing all the old hollow core doors with solid 6 panel doors with a smooth finish. The hardware will be a matte black. Can’t wait!
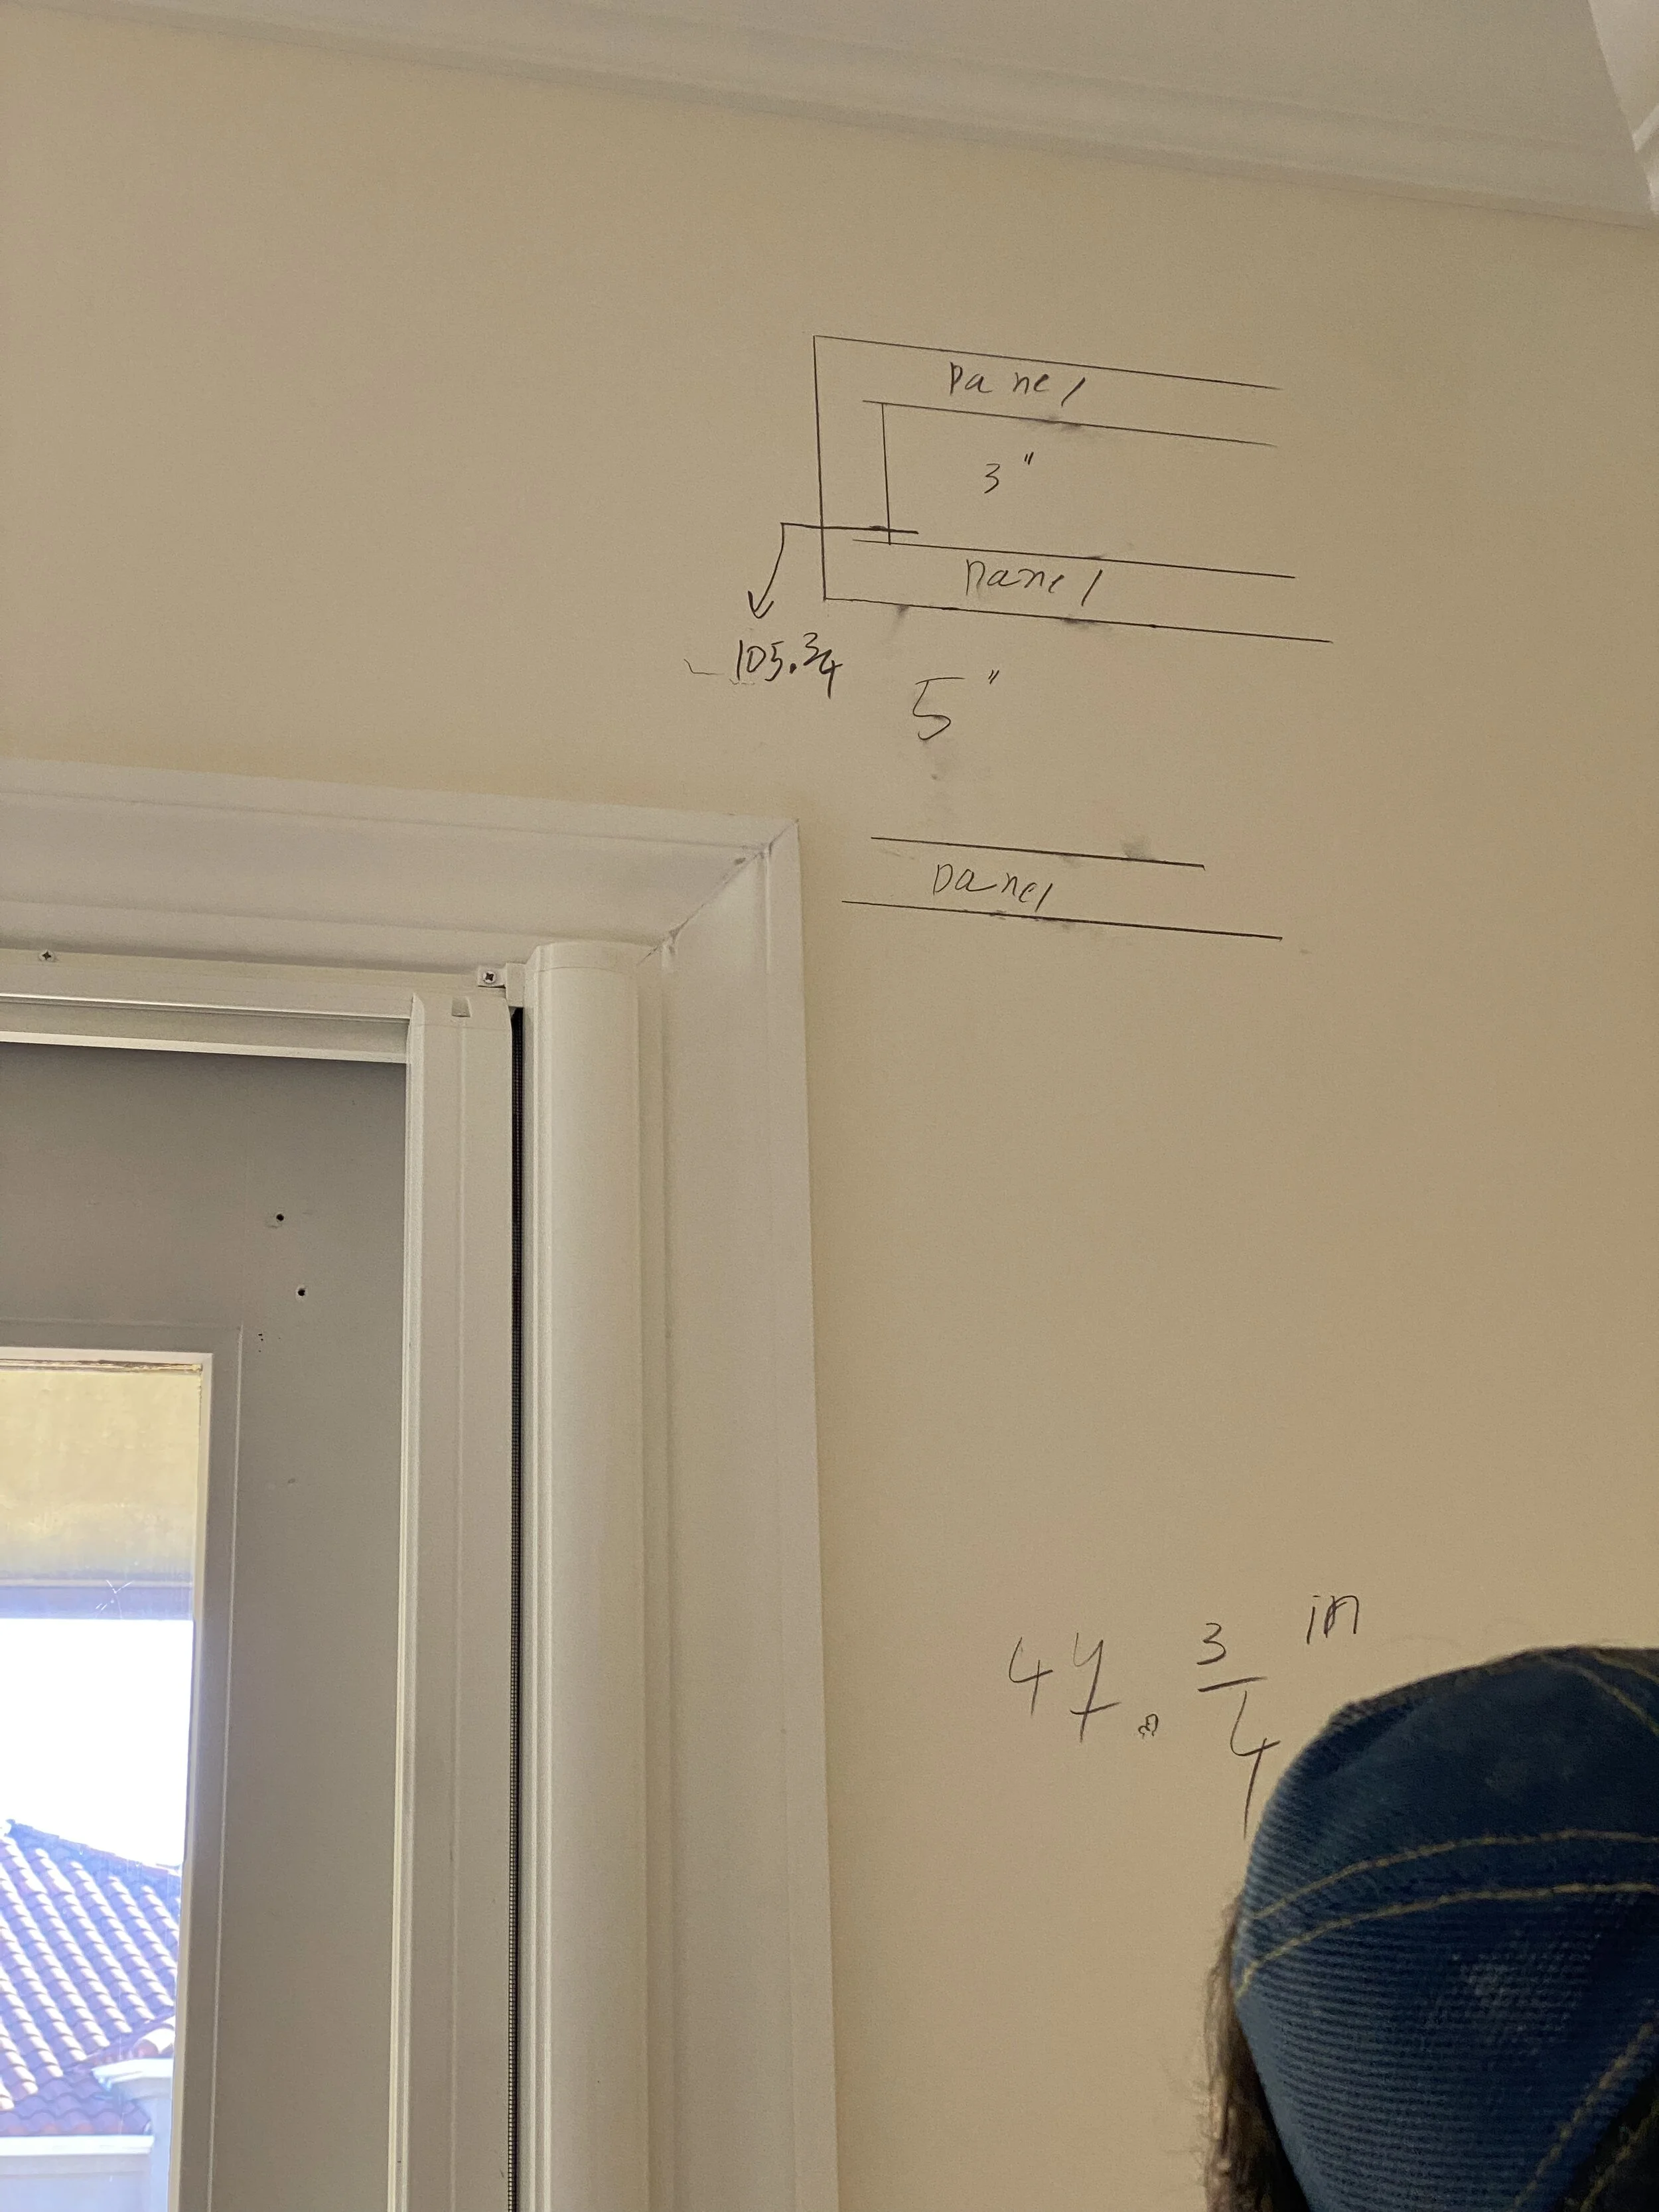
Planning for picture moulding is always a giant puzzle. The carpenter and I must have spent at least 3 hours working out the details. Here’s part of the planning notes he made on the wall.
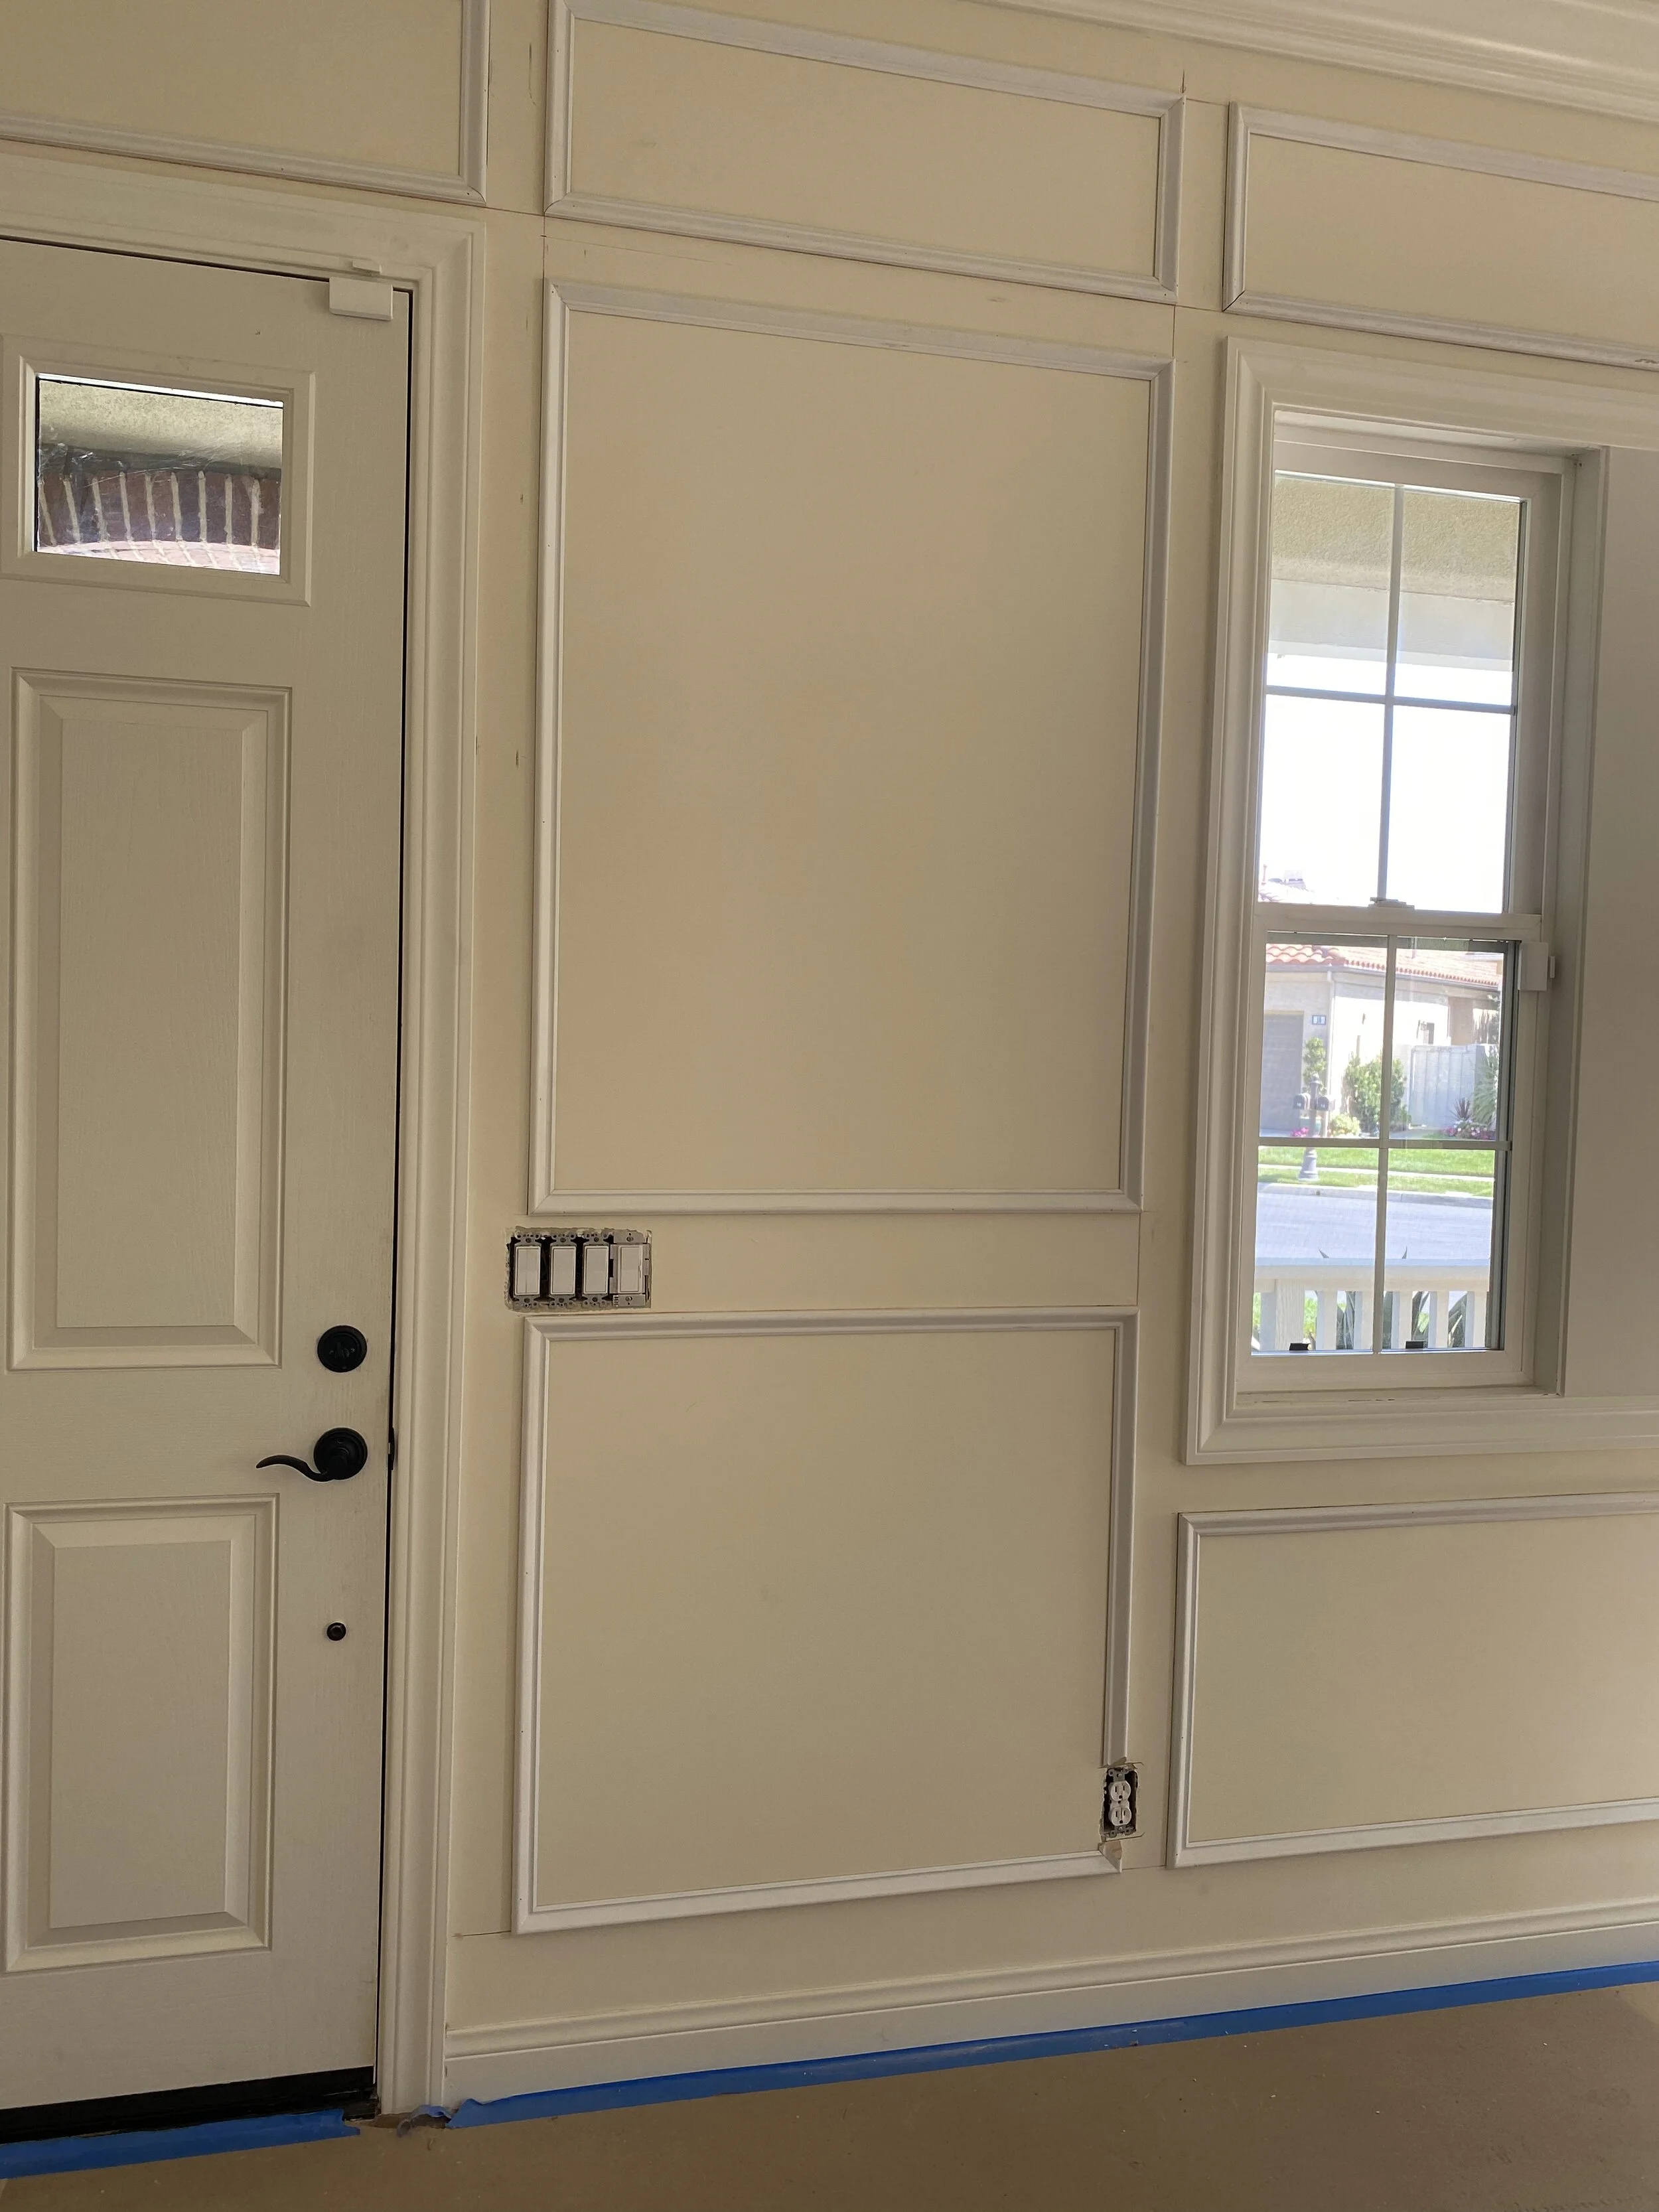
The first step was to find the obstacles. Things like switches, outlets and door and window heights. I also needed to be sure my artwork would still be balanced within whatever picture frames of moulding we ended up with. So, looking at the front door (an important focal point), we could see that the switch plates could live between the two panels of the picture frame. This dictated the height of both the bottom and upper frames. Here is the front door and light switches I’m talking about. If you don’t find a way to put that switch in the middle of two frames, you’ll wind up with a partial frame which can be awkward. And because no room is ever perfect, I chose this wall to work from and then use partial frames on other walls that wouldn’t be as noticeable. Make sense?
The spacing between these frames also came into question with the drapery rods I’ll be hanging drapery panels above the front windows and the dining room French doors. Here’s a photo of the moulding over the French Doors. Since I know that the drapery rod must be placed at 106” off the floor, to avoid a rod that doesn’t look centered in the picture frame, we chose to use a 3” spacing for the upper frames. I know how this must be sounding to you. It takes some time, and it really comes down to site lines and a little math. And a carpenter who is precise.

Here are a few shots of the moulding installed in these two rooms and the kitchen stair wall.


After the rest of the doors and hardware are installed, the painter will come in. I plan to do the stair wall in a semi-gloss but in the gold color of the other walls. This is my solution for diminishing the “bowling alley” view we have from the front door to the back. (Not to mention bad Feng Shui). Between the color differences, the doorways, and the moulding, I am creating two separate rooms.
Here is what it looked like when we first started working on the house and here it is today. Looking from the main room to the kitchen is no longer a plaster arch. The stairs now return to the bottom step so there is a visual break between the two areas. Can you feel the difference?

Walls Before

Walls After
I’ll check back with you soon as we make our way through the rest of the changes I’ve planned. Can’t wait to share! In the meantime, check out the DIY Outlet for lots of helpful e-guides and easy courses!
Join our newsletter below to be sure you don’t miss any updates on my home renovation!