Our Home Reno Series: Re-piping & Lighting
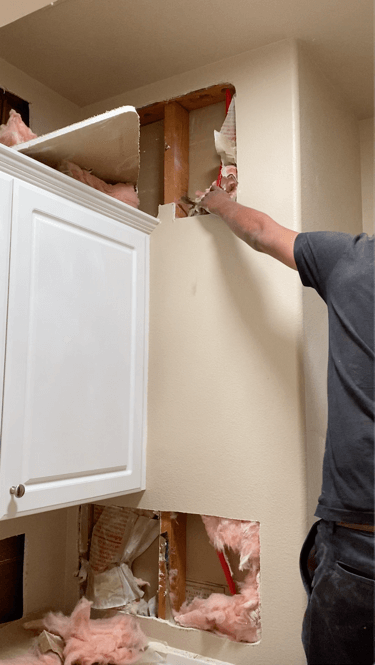
Do you remember when I mentioned the 45 holes in our walls? That was no joke. A bunch of our neighbors had started to experience pinhole leaks in their plumbing right around the time we were moving in. Apparently, the original builders had used an inferior copper piping material and it was now beginning to cause problems. It seems most re-pipe companies are now using a material called PEX Pipe, a flexible synthetic that is considered to be one of the better choices these days.
It seemed everyone was re-piping their house. Including several neighbors right here on our own street. My husband knew how much renovation I wanted to do to our new home and he suggested we re-pipe too. (Oh, Joy.) He said, why not tear the walls apart now rather than after I had finished putting up that beautiful wall covering I was planning? Smart man.
But you thought the flooring was a mess, right? Take a look at this…


Also, our plumber suggested we add a pump to the tankless water heater in order to deliver hot water faster to the whole house. That was such a great idea and has really helped!
So, while we were at it…. (those are 6 words you never want to utter =0), I also wanted to change out some of the lighting and electrical before starting to decorate.
Because a drywall crew would follow the re-pipe work why not patch both the plumbing and electrical work at the same time? This made good sense. (After they finished opening walls for the new pipes and lighting, I counted 45 holes!!! (Be sure you check the next part in this series all about my drywall changes!)
So… right on the heels of the re-pipe crew, came the electricians. We kept a full crew busy for 3 more days.
In addition to the plumbing changes, we removed 1 giant ceiling fan and a chandelier, relocated 2 other ceiling fans, removed 4 LED/solar tubes, moved, added, and upgraded all the recessed light fixtures, moved the wall switches and outlets, and added some outdoor outlets.
(I say “we” but actually I was just pointing my finger. LOL)
(It’s normal to want to jump right in when you first buy a new home but let me recommend that you just live in your new home for a while—a few months if you can stand it. You’ll have a chance to think about how you want to use your rooms, how the light plays in each and how the traffic (people) flows before you make major changes like I’m describing.)
I had already had a long while to think about these things before this work began. And of course, having done this type of work for 20 years, I could rely on my experience.
Here were my thoughts on our lighting for the living and dining rooms:
Our living room is actually one giant living and dining room combination. There is no entry hall or a separate room, the ceilings are 10 feet high and there are two large niches in each of the living and dining spaces.
The first step was to think about how I wanted to arrange our furniture. It’s good to know where the activity zones will be and I always want to avoid a light fixture directly over someone’s head. It’s kind of like a Halloween flashlight under your chin in reverse. =0) I also needed to know where outlets would be needed and of course accent lighting for artwork or accessories.
Here’s my space plan for the living/dining room using our existing furniture pieces we brought with us to our new house. This is oversimplified but when we get to the decorating phase, I’ll share the details.
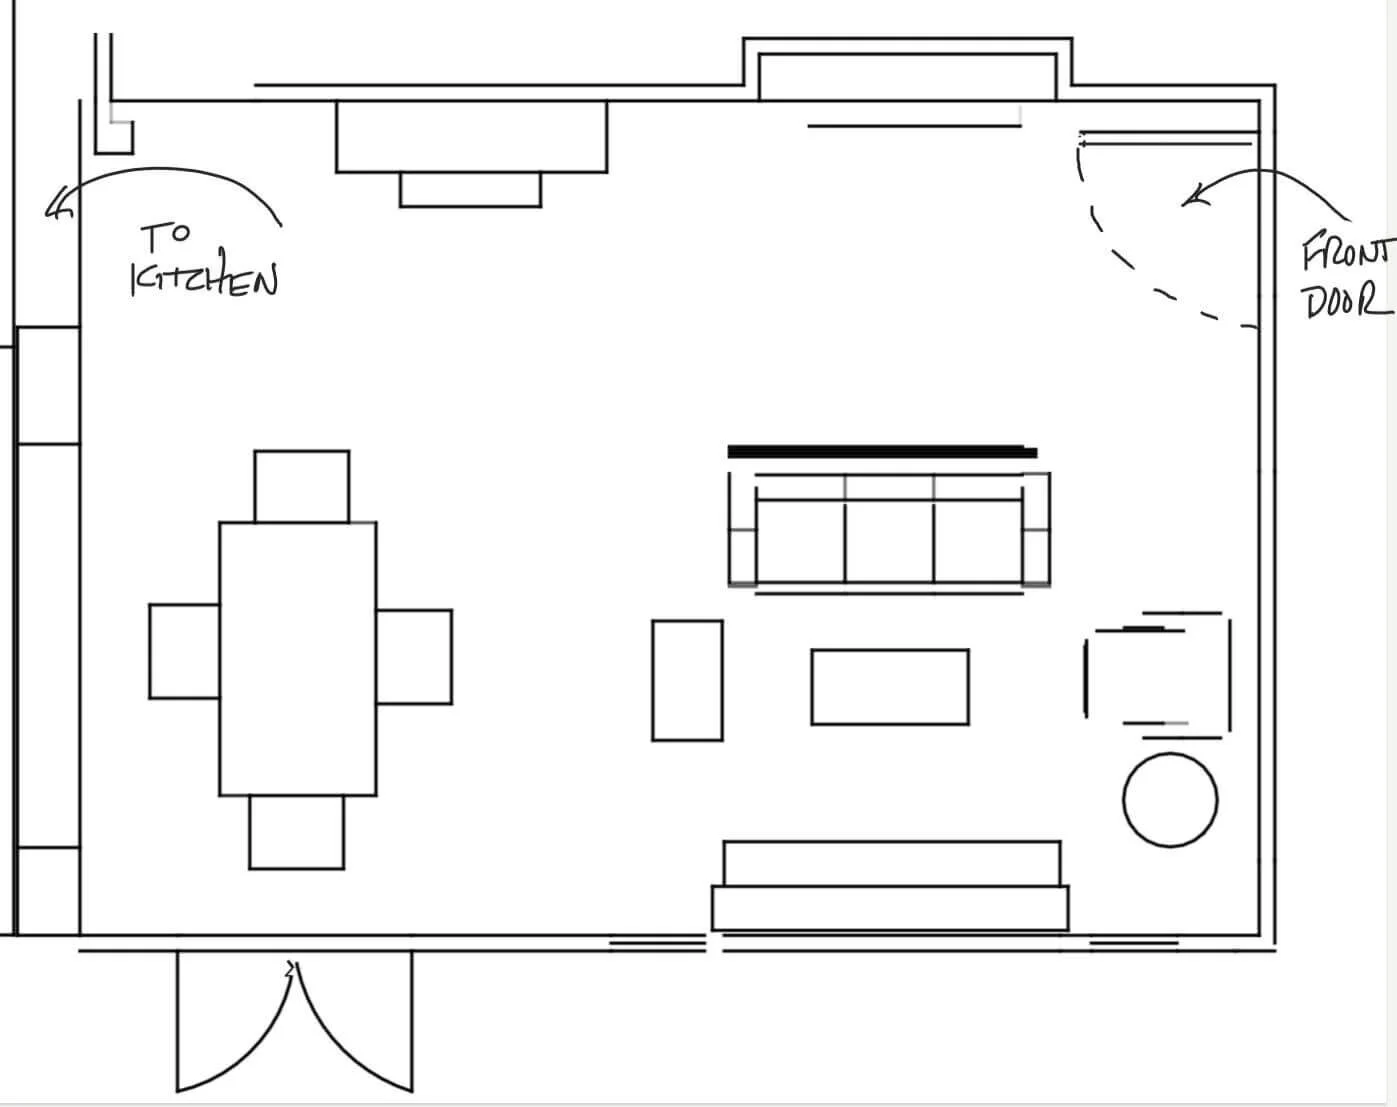
In my lighting plan (below), you’ll see two larger circles which represent where the chandelier is over the table and a ceiling fixture at the front door will be installed. Since there is no formal entry, the light over the front door will help give a sense of an entry hall as you enter the house.
The smaller circles represent the recessed lighting. They are now placed in a grid pattern and this helps to give some order and balance to such a large room. They also help to define the two separate spaces for living and for dining because the switching is set up to illuminate one zone or the other. We didn’t need a recess over the table because a chandelier will do the trick. All in all, there are three zones plus spotlights for the mantle and the two niches.

The new recessed fixtures are LED, are energy-friendly, and will last a very long time. Each unit has 4 light temperature settings (color) within them. Naturally, I chose the lowest at 2700 K because it is the warmest light and similar to incandescent. LED technology has come a long way and it is no longer necessary to have glaring blue light in your home. We also installed dimmer switches for every recessed fixture to control the intensity and mood of each room.
Here’s a shot of the room’s ceiling in process. Remember, we were removing and relocating almost every ceiling fixture so it just looks like a mess in the photo.

Next time, I’ll show you some of the changes I made to that archway and some crazy doorways we found in our home.
I hope you’re enjoying my reno series. Please share this with your friends if you think they would like to tag along. Ask them if they’d like to subscribe to my list so they won’t miss a thing.
And if you’d like to learn more about interior design and how to design your own home, let’s have a quick call and I’ll show you my 3 easy steps to creating your dream home!